 DataCareph
WordPress Vulnerability Scanner: Protect Your Website from Malware

WordPress is one of the most popular content management systems, powering millions of websites worldwide. However, its popularity also makes it a prime target for hackers and malware attacks. To ensure the security of your #WordPress site, it’s crucial to regularly scan it for vulnerabilities and malware. In this article, we will discuss the importance of using a WordPress vulnerability scanner and provide guidance on running malware scans effectively.
WordPress Vulnerability Scanner: Why It Matters
A WordPress vulnerability scanner is a tool designed to identify security weaknesses and potential entry points for hackers. By regularly scanning your WordPress site, you can proactively detect and address vulnerabilities, minimizing the risk of a malware infection. Let’s explore some key benefits of using a WordPress vulnerability scanner:
Early Detection of Vulnerabilities: A vulnerability scanner helps you identify security loopholes before they are exploited by hackers, allowing you to take preventive measures promptly.
Protection Against Malware: Malware can cause significant damage to your website’s reputation and functionality. A vulnerability scanner helps you detect malware infections and remove them swiftly.
Enhanced Website Security: By regularly scanning your WordPress site, you can ensure that your security measures are up to date, preventing unauthorized access and data breaches.
Scan WordPress Site for Malware: Step-by-Step Guide
Running a #malware scan on your WordPress site is an essential part of maintaining its security. Here’s a step-by-step guide to help you perform an effective malware scan:
Choose a Reliable WordPress Vulnerability Scanner Plugin: There are several reputable WordPress vulnerability scanner plugins available. Look for plugins that offer comprehensive scanning capabilities, regular updates, and positive user reviews.
Install and Activate the Plugin: Install the chosen #vulnerability scanner plugin from the WordPress repository. Once installed, activate the plugin on your WordPress dashboard.
Configure the Scanning Settings: Each vulnerability scanner plugin may have its own settings and options. Configure the scan settings according to your requirements, such as the frequency of scans and the areas of your website to scan.
Run the Malware Scan: Initiate the scan by clicking on the appropriate button or link provided by the plugin. The scanner will analyze your website for vulnerabilities and malware.
Review the Scan Results: Once the scan is complete, review the scan results provided by the vulnerability scanner plugin. Pay attention to any detected vulnerabilities or malware infections.
Take Necessary Actions: If the vulnerability scanner identifies any issues, follow the recommendations provided by the plugin to address them. This may involve updating plugins and themes, removing malicious code, or strengthening your website’s security settings.
WordPress Vulnerability Scanner Plugin: Top Recommendations
When it comes to WordPress vulnerability scanner plugins, several options can help safeguard your website. Here are three popular and reliable plugins to consider:
Sucuri Security: #Sucuri Security offers a comprehensive suite of security features, including malware scanning, firewall protection, and activity monitoring.
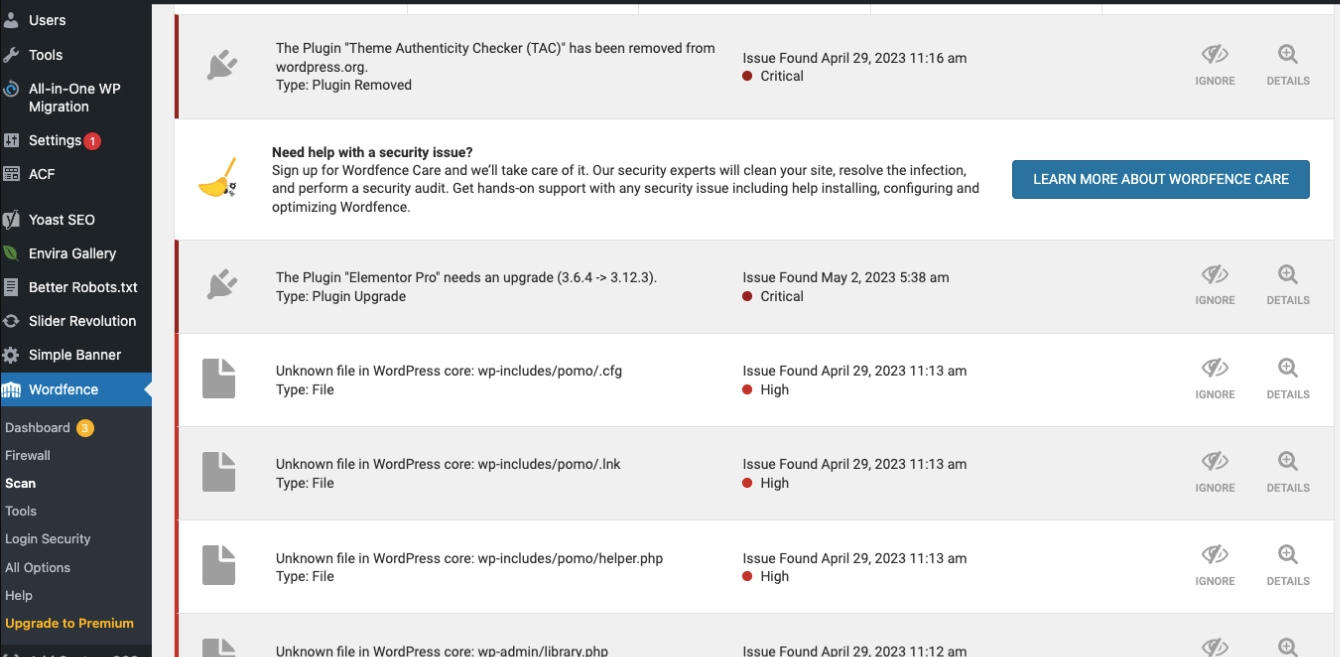
Wordfence: #Wordfence is a widely used security plugin that offers a powerful vulnerability scanner, real-time threat intelligence, and various other security enhancements.

iThemes Security: Formerly known as Better WP Security, #iThemes #Security provides a user-friendly interface and features like malware scanning, brute force protection, and file integrity checks.
How Do I Run a Malware Scan on a Website?
If you’re new to running malware scans on websites, it’s natural to have questions. Here’s a simple step-by-step guide to help you get started:
Choose a Trustworthy Malware Scanner: Select a reputable malware scanner that suits your needs and offers features like regular updates, comprehensive scanning, and reliable support.
Install and Configure the Scanner: Follow the installation instructions provided by the malware scanner. Once installed, configure the scanning settings according to your preferences.
Initiate the Scan: Start the scan by clicking on the scan button or link within the malware scanner’s interface. The scanner will analyze your website for any signs of malware.
Review the Scan Results: After the scan completes, carefully review the scan results. Pay attention to any identified malware infections, their severity, and the affected areas of your website.
Clean and Secure Your Website: If the scan detects malware, follow the instructions provided by the scanner to remove the infections and secure your website. This may involve deleting infected files, updating vulnerable plugins, or strengthening your website’s security measures.
In conclusion, safeguarding your WordPress website from malware is vital to its security and reputation. Regularly scanning your site using a WordPress vulnerability scanner and a reliable malware scanner helps you stay one step ahead of hackers. By taking proactive measures, you can ensure a safer online environment for yourself and your visitors. DataCarePh is happy to help customers or clients with the said issue.